How to Get PERFECT Cheesecake Every Time
This blog post will ensure that you get a perfect, crack-free cheesecake every time!
I have witnessed countless cheesecakes being made, tasted, and enjoyed. Don’t get me wrong, I’m not a pro baker. My experience stems from my taste buds experiencing many flavours. My mother, grandmother, aunt, and I all make them differently.
Whipping up the cream cheese takes me back. My earliest memory of baking is of my grandmother luxuriously beating condensed milk with cream cheese, the layers forming only to be pushed by newer ones. Smiling, wonder still evident in her voice, she would then go on to relate the story of how the batter always reminded her of the time she visited a factory as a kid where they stirred silky smooth, frothy cream in a huge metal vat.
So, I have amassed not only a list of all the tips and tricks I knew (from experience) but some I dug online that I tried and tested and found to be true.
Fat for the Flavour.
Okay so I kind of dislike saying don’t use this or that kind of ingredient. And I can assure you that cheesecake made from low-fat cream cheese tastes very very good. However, there is a plate-licking quality you get from using full-fat cream cheese (in a cheesecake) that gives you the satisfaction from cheesecake that you want.
Want smoothness? Don’t use cold ingredients.
I still slip up with this one sometimes – usually when I’m in a rush. Make sure the eggs, butter (if using), and cream cheese are all room temperature. This helps to ensure that your batter mixes well and you don’t have pesky bits of cream cheese floating around in it.
No cracks: do not overmix after adding the eggs.
Beat the cream cheese and other ingredients before adding the eggs. Do this until the cream cheese is silky-smooth and lump-free. (It would be easier to work with the cream cheese when it is room temperature.) Then fold eggs in with a spatula or a large spoon. You can do so with a beater as well, but be very careful not to over-mix. Stop until eggs are just incorporated. This will ensure that you have little to no cracks in your finished cheesecake.
Grease.
Grease your pan or baking dish before pouring in the batter, even if it is non-stick. If your cheesecake refuses to let go of the sides of the pan after it’s baked, then this can create ugly cracks.
Perfect crust: hold off on the sugar.
This obviously doesn’t apply to non-crushed graham crackers used for the crust. However, when using graham crumbs for the crust bottom, know that adding sugar with the crumbs hardens the baked crust. It yields a crust that is difficult to cut especially if you’ve used a lot. Using no sugar results in a more light-tasting, soft yet crunchy, crust that balances the textures and flavours of filling and crust. (In my humble opinion.) Don’t worry about the crust holding together, as the fat that you used will keep it stable and solid.
I mean, why have sugar when you can avoid it there, right?
Also, I’ve learned this video said that you even use digestive or other biscuits for the crust. (Side note: the fluffiness of the batter he made in this video is what you want.) This had never occurred to me but now I’m delighted! Ugh, I’m so rigid when it comes to traditional ingredients used that I never thought you can just crush cookies to make crumbs. *hides in corner*
Use a baking tray!
It isn’t necessary to place the cheesecake on a baking tray before putting it in the oven. Depending on how high you’ve made the walls of the crust, and if the crust is not backed up with the batter (like pie), the top might spill onto your cheesecake after you take it out of the oven. How? It will if you’re clumsy and impatient like me. LOL. No, seriously though: if you accidentally touch the dry graham crust while handling the cheesecake from one place to another, it’ll ruin the spotless face of your cheesecake. So use a baking tray! Personally, I most often use a pie dish to bake my cheesecakes and so the edges provide a better grip than a spring-form pan.
*slaps wrist* No Peeking!
Refrain yourself (and others!) from opening up the oven door while your beautiful cheesecake is baking. To check the “doneness”, open the oven door towards the ending of the baking time. Maybe like in the last quarter of the baking time.
Done? Is my cheesecake done?!
In case you don’t want to poke holes repeatedly in your cheesecake to figure out if it’s finally done, gently tap the side of the pan with a wooden spoon to test out its jigglyness. I would explain in more um English words but this article does it better (and even has a video).
Refrigerate.
After your beautiful cheesecake comes out of the oven and is cooled to room temperature, swipe it away before anyone has a go at it and tuck it away into your refrigerator. It is an understatement when I say that cheesecake always always tastes better the next day compared to only 3-4 hours and certainly better than no fridge time.
For many other desserts as well, the melding of the flavours in the refrigerator does wonders for the end results. This tip is one of the reasons cheesecake makes a great dessert for guests. Quick preparation AND you can make it a day before.
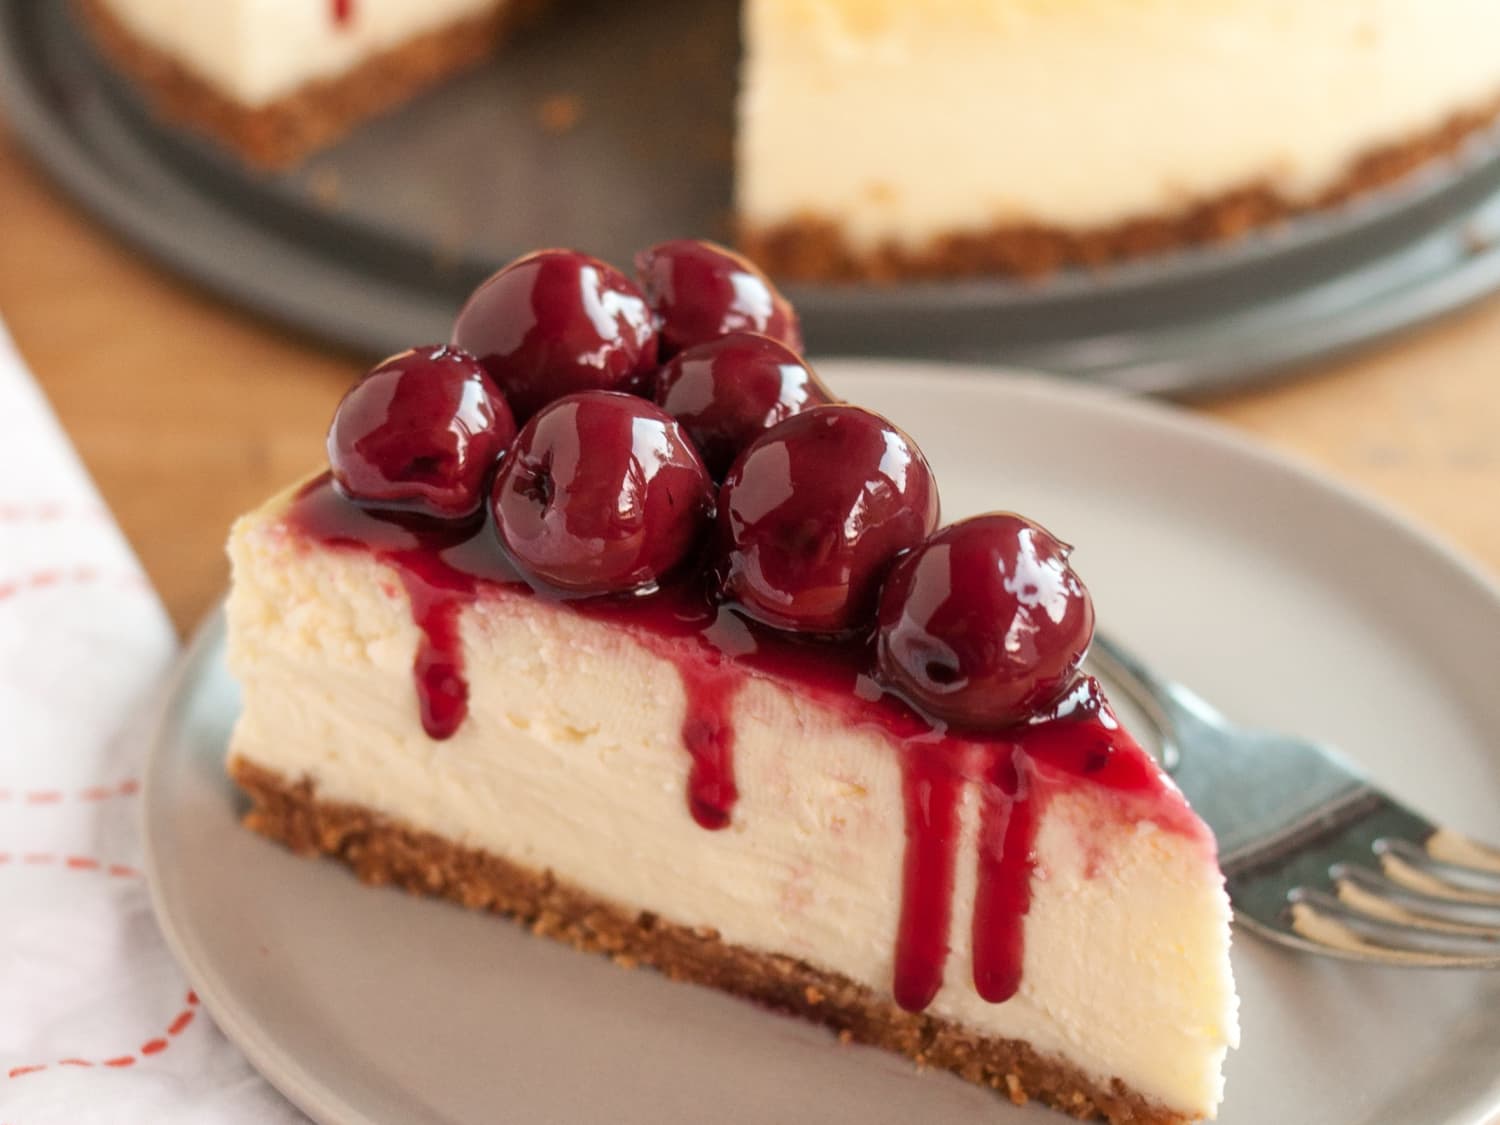
Still, it cracked 🙁
It happens. I feel you. To cover up any unfortunate cracks, use what I call cheesecake make-up. Cherries or whipped cream or both! If you don’t have either then no worries. Lightly sift icing sugar across the top or sprinkle some grated (or chopped) chocolate bits. Ha!
Wipe the knife after each slice.
When there’s a line of onlookers waiting to dig in, I dread cutting the very first slice for fear of it breaking apart or not coming out right, especially if it’s a recipe I’ve not tried before. For cheesecake, however, there’s nothing to sweat about (unless you’ve done something like put in salt instead of sugar!) Use a clean and sharp knife, dip it in hot water, dry it off and then slice.
Starting in the center, insert the tip of the knife until it reaches the bottom. Keeping your cool, slowly cut towards the edge while keeping the knife rooted inside the cake. Do NOT take it out, even if the knife stopped touching the bottom mid-way through the slicing process. Wipe the knife. I tend to do this on the edge of a plate, my plate so I get extra freebies ;). Now you not only have the perfect cheesecake but a perfect cheesecake slice as well. Voila!